


Frequently Asked Questions
Customer Support Questions
We want your beautiful new tiles to arrive in perfect condition, ready for your project. Depending on the size and weight of your order, here is what you can expect:
- Pallet Deliveries: Most tile orders are carefully wrapped and secured onto a sturdy wooden pallet. Your delivery driver will use a tail lift and a manual pallet truck to unload your order. They will then position the pallet at the nearest accessible point to your property. Please ensure this route is level, flat, and paved with a hard surface, as our pallet trucks cannot travel over gravel, grass, steep slopes, or steps.
- Parcel Deliveries: For smaller orders, we use a trusted parcel courier company to ensure your tiles arrive safely and efficiently.
If you have any specific concerns about access to your property or need to discuss your delivery requirements, please feel free to give our team a call on 01438 582928—we are always happy to help ensure everything goes smoothly.
All our outgoing deliveries are carefully packed and checked. However, tiles are fragile and can get damaged in transit. Should you have any damages please let us know within 48 hours of delivery and we will arrange replacements for you. Either email us at customersupport@greattiles.co.uk or complete the form below. Please include any batch numbers you have received. This will allow us to match them where possible.
We completely understand that sometimes projects grow or a few extra tiles are needed to complete the perfect finish. If you find yourself needing more, our team is here to make the process as seamless as possible.
The most important detail for us to get right is your batch number—this ensures the shade and texture of your new tiles perfectly match what you have already installed. If you are unsure where to find it, simply grab an empty box from your previous order; the batch information is clearly printed on the label.
Here is how you can get in touch to discuss your requirements and check current stock and delivery times:
- Give us a call: Speak with our team directly on 01438 582928. Having your batch number ready when you call will help us find the right match for your project quickly.
- Send us an email: Drop us a note at customerservice@greattiles.co.uk. If you choose to email, please include the batch number or attach a clear photo of the box label showing the product information. This allows us to check our central warehouse stock immediately.
- Live Chat: For the fastest response, click the live chat icon on our site to speak with an advisor in real-time.
Once we have those details, we will get straight to work contacting our central warehouse to locate your specific batch. We are passionate about seeing your project through to completion, so please do not hesitate to reach out—we are here to help you get exactly what you need.
Planning Your Tiling Project
Calculating your requirements is the first exciting step in bringing your vision to life, and it helps you get a clear view of your project costs. We recommend a simple, measured approach to ensure you have exactly the right amount.
Step 1: Sketch your space
Start by drawing a birds-eye view of the area you intend to tile. It doesn’t need to be a masterpiece or perfectly to scale—what matters are the actual measurements. Measure each wall length carefully.
Step 2: Break it down
If your room isn’t a simple square, divide the space into smaller rectangular segments. This makes the math much easier!
Step 3: Calculate the area
For each segment, use the simple formula: Width x Length = Area.
- For example, a large section measuring 400cm x 475cm = 190,000cm².
- Then, calculate your smaller section, for example: 150cm x 325cm = 48,750cm².
- Add your totals together: 190,000 + 48,750 = 238,750cm².
Step 4: Convert to square metres
Divide your total by 10,000 to find your required square metres:
- 238,750 / 10,000 = 23.875m².
Step 5: Don’t forget the wastage
We always recommend adding an allowance for cuts and potential breakages. As a rule of thumb, add 10% to your total. If you are using very large format tiles or creating a complex pattern like a herringbone, we suggest increasing this to 15%.
- 23.875m² + 10% = 26.26m² (Your final order total).
Great Tiles Tip: Always keep a few spare tiles from your batch once the project is finished. Should you ever need a repair in the future, having tiles from the same production run ensures a perfect, seamless match.
If you are ever unsure about your measurements or how to calculate for a tricky corner, please give us a call on 01438 582928—our team is always happy to help you get your quantities spot on!
Choosing the right adhesive is essential for the long-term success and durability of your project. The best choice depends on the type of tile, the size, and the surface you are tiling onto.
Choosing the Right Type
- Ready-Mixed Adhesive: This is convenient for small-format ceramic wall tiles in dry areas (like a kitchen splashback). It is easy to use and ready to go straight from the tub.
- Powder Adhesive: For larger format tiles, floor tiles, or any porcelain tile, you must use a powder-based adhesive. These are mixed with water to create a high-strength bond capable of supporting heavier weights and standing up to foot traffic.
- Flexible Substrates: If you are tiling onto surfaces prone to movement, such as timber floors or areas with underfloor heating, you must use a flexible S1 adhesive. This allows for slight movement without cracking your tiles or grout lines.
- Choosing the Right Colour: We always recommend using a white adhesive when installing natural stone, light-coloured marble, or if you are using white grout. This prevents the dark grey colour of a standard adhesive from showing through translucent or porous stones.
Our Recommended Range
We stock a high-performance range of Ultra adhesives to suit every requirement:
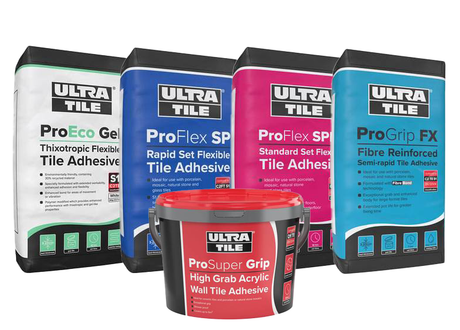
- For Flexible/Large Format Projects: Our Ultra ProEco Gel, ProGrip FX, and ProFlex SP ranges are all S1 flexible adhesives, perfect for porcelain and large-format tiles. We offer these in both White (ideal for stone and light tiles) and Grey (the go-to for standard floor tiles) in both Standard and Rapid set options.
- For Small Ceramic Wall Tiles: Our Ultra Fix ProSuper Grip ready-mixed tubs offer excellent bond strength for quick and easy wall tiling. We offer this in both White and Standard finishes.
Great Tiles Tip: Always check your tile's technical specifications and the substrate you are tiling onto. If you are unsure which adhesive is best for your specific wall or floor, give us a call on 01438 582928—we are here to help you get the right product for a professional, lasting finish.
Thanks to modern adhesive technology, it is now possible to tile onto almost any surface. The secret to a long-lasting, professional finish lies entirely in the preparation and choosing the correct adhesive for your specific foundation.
Even if your current surface—such as an uneven timber floor or a damaged wall—isn’t ideal for direct tiling, you can easily prepare it by "overboarding" with high-quality products like Tecca Fibre Cement Board. This creates a stable, perfectly flat substrate that provides the ideal base for your new tiles.
We offer a comprehensive range of adhesives capable of handling diverse surfaces, but we know it can be a little confusing to decide exactly what you need. Our team is here to guide you through every step of your project's preparation.
Great Tiles Tip: Before you start, ensure your surface is clean, dry, and structurally sound. If you are ever in doubt about what lies beneath your tiles, do not guess—it is better to get expert advice first to ensure your investment stays secure for years to come.
If you are unsure about the best way to prepare your specific wall or floor, please give our team a call on 01438 582928. We are always happy to chat through your requirements and advise you on the most reliable way to install your tiles, no matter the surface.
Choosing the right tile size is one of the most transformative decisions you can make in your design journey. As a designer, I don’t just see tiles as a floor or wall covering; I see them as a way to manipulate the light, scale, and atmosphere of a room. There is no "one size fits all," but there are guiding principles that will help you achieve a high-end, cohesive result.
Small Rooms: The "Scale" Philosophy
In smaller spaces like guest bathrooms or cozy kitchens, we often lean toward two schools of thought. A larger-format tile can actually make a small room feel grander by minimizing grout lines, which creates an expansive, uninterrupted surface. Conversely, a classic metro tile or smaller format tile can add a beautiful, rhythmic texture that creates a sense of "cosy luxury." If you have limited floor space, larger tiles are generally superior for creating that airy, spa-like atmosphere.
Open-Plan vs. Closed-Plan
- Open-Plan Spaces: When you are working with large, open-plan living areas, large-format tiles (60x120cm or larger) are truly the gold standard. They bridge the space between the kitchen, dining, and living areas seamlessly. By reducing the number of grout lines, you allow the eye to travel across the floor without distraction, which emphasizes the sheer scale and architectural openness of the room.
- Closed-Plan/Individual Rooms: In smaller, individual rooms, you have more freedom to be expressive. Smaller tiles or intricate patterns can define a space, giving it its own distinct character, whereas a monolithic, large tile can sometimes feel a bit cold in a very small, confined area.
Height and Verticality
Don’t forget your walls! If you have lower ceilings, consider a vertical stack of larger-format tiles. This draws the eye upward, creating an illusion of height. If you are blessed with high ceilings, you have more room to experiment with varied formats and horizontal patterns to ground the space.
Great Tiles Tip: The secret to a designer-led finish is the balance between tile size and your grout choice. If you opt for large-format tiles, use a grout colour that closely matches the tile to achieve that "nearly seamless" look. If you choose a smaller tile, don't be afraid of a contrasting grout to highlight the pattern—it adds a layer of depth and craftsmanship that defines "quiet luxury."
Ultimately, the best tile is the one that respects the architecture of your home. If you are trying to decide between a grand large format and a characterful smaller tile, give us a call on 01438 582928. Tell us about the space you are designing, and we can help you choose the scale that will make your room look its absolute best.
Drawing on years of experience both supplying premium materials and being hands-on with site installations, we've learned that the true measure of a tile isn't found in a showroom display—it’s found in how it performs under your feet every single day. When we look at the core of modern design, we are left with two heavy hitters: porcelain and ceramic. Here is how we weigh them up from the perspective of someone who has laid them, lived with them, and understands the technical demands of a lasting installation.
Porcelain vs. Ceramic:
- Porcelain: If you are looking for long-term resilience, porcelain is my top recommendation. It is fired at significantly higher temperatures than ceramic, making it incredibly dense, water-resistant, and essentially scratch-proof. In high-traffic areas like hallways, busy kitchens, or open-plan living spaces, porcelain is the gold standard. It is the workhorse of the modern home.
- Ceramic: Ceramic is a fantastic, cost-effective choice for rooms with less "wear and tear," such as a guest bathroom or a utility room. It is easier to cut and install, which can keep your labour costs down. However, it isn't as dense as porcelain, so I wouldn’t advise using it in areas where you’re moving heavy furniture or expecting significant foot traffic.
Style and Surface
When choosing your style, think about the "character" of your home.
- Wood-Effect Tiles: These have completely transformed the market. You get the warmth and aesthetic of timber with the sheer durability of porcelain. They are perfect if you want that natural feel in a kitchen or conservatory without the worry of moisture damage or scratching from pets.
- Modern Concrete and Minimalist Effects: These are brilliant for a contemporary, architectural finish. They provide a clean, "quiet luxury" backdrop that makes your furniture and lighting pop.
Does Size Really Matter?
In our experience, size changes everything.
- The Large-Format Advantage: Using 60x60cm or 60x120cm tiles in a large room is the professional’s secret for making a space look bigger. Because there are fewer grout lines, the floor looks like one continuous, uninterrupted surface. It’s cleaner, easier to wipe down, and feels much more premium.
- The "Pattern" Play: If your room is an awkward shape, don't be afraid of smaller formats. They can actually be more forgiving to install in rooms with lots of corners, and they allow for creative patterns that add a layer of personality that a giant tile just can’t replicate.
Great Tiles Tip: Regardless of the tile you choose, check the "PEI rating" (the wear resistance). For any floor area in the home, aim for a PEI rating of 3 or 4 to ensure your floor stays looking as pristine in ten years as it does on the day you lay it.
Every project has its own unique challenges—the subfloor, the lighting, the foot traffic. If you’re torn between a large-format porcelain or a characterful ceramic, give our team a call on 01438 582928. we’ve seen enough installations to know exactly which product will give you the look you want while standing up to the reality of your daily life.
Creating a wet room is a wonderful way to bring a touch of spa-like luxury into your home. Because the entire floor effectively acts as a shower tray, safety is the most important element of your design. When water is constantly present, selecting the right surface is vital to ensure your space remains safe, secure, and beautiful.
We always recommend choosing a tile with a high anti-slip rating for the floor of a wet room. These ratings are determined by the ‘R’ scale (or ‘Ramp Test’), which measures the friction and grip a surface provides. The scale runs from R9 to R13, with R9 offering the least resistance and R13 the highest.
For the floor of a wet room, we suggest focusing on tiles with an R11 rating or higher. This level of slip resistance is specifically engineered to perform reliably even when the floor is completely wet, giving you the confidence and stability you need for a truly relaxing experience.
Key features
- Enhanced Safety: An R11 rating (or higher) provides the necessary texture and grip to keep the floor safe for bare feet in high-moisture conditions.
- Low Porosity: We recommend using porcelain tiles for your wet room floor; they are incredibly dense and water-resistant, making them the ideal partner for a bathroom environment.
- Continuous Design: Because of the superior performance of modern porcelain, you can often carry the same tile from your bathroom floor directly into the wet room area for a seamless, designer aesthetic.
Great Tiles Tip: While focusing on the floor, don't forget the fall! For any wet room to function perfectly, ensure your installer creates a slight, consistent gradient toward the drain. This ensures water moves away quickly, keeping your floor as dry as possible and letting the beauty of your chosen tiles shine through.
Integrating underfloor heating into your home is the ultimate way to bring year-round comfort to your space. The wonderful news is that your choice of floor tiles is virtually limitless! Because porcelain and ceramic are such excellent thermal conductors, they are the perfect partner for any underfloor heating system, helping the warmth rise evenly and efficiently throughout your room.
While almost any tile works beautifully, there are a few expert touches to keep in mind to get the very best results from your new heating system.
Great Tiles Tip: While larger tiles are excellent for heat distribution, remember to keep your slip-resistance needs in mind as well. If you are installing your heating in a room that might get wet, such as a bathroom or kitchen, look for tiles with an R10 or R11 rating. You get the perfect combination of safety and luxurious, cozy warmth!
If you are planning your project and want to ensure you have the perfect balance of style, heat efficiency, and safety, please give our friendly team a call on 01295 233 640.
When you are looking to refresh a room, the idea of tiling over your existing floor or wall might seem like a brilliant time-saver. While it is technically possible in many cases, it is a project that requires a careful, professional approach to ensure the end result is both beautiful and long-lasting.
In most scenarios, you can tile over existing surfaces, provided that the original tiles are perfectly sound, securely bonded, and free from any cracks or loose areas. If the underlying substrate is solid, a high-performance, flexible tile adhesive can be used to bridge the two layers.
However, there are important practical considerations that come with this method:
- Height Clearance: Adding a new layer of tiles will raise your floor height. You must check that this won’t cause issues with existing doors, which may need to be trimmed, or transitions between rooms.
- Fixtures and Fittings: A raised surface can impact plumbing and drainage heights, and you may need to adjust light switches, sockets, or skirting boards to accommodate the new depth.
- The "Clean Slate" Advantage: While it requires more initial effort, removing the old tiles and tiling directly onto the substrate is almost always the preferred route. It gives you the best foundation, ensures your final surface is level, and removes any uncertainty about the integrity of the old installation.
Great Tiles Tip: If you do decide to tile over your existing floor, always give the surface a thorough clean with a degreaser to remove any residual floor wax or grime. A perfectly clean, keyed surface is essential for the new adhesive to create a strong, lasting bond with the old tiles.
If you are currently deciding whether to rip out or tile over, please give our friendly team a call on 01295 233 640—we would be happy to talk through your specific space and help you decide which path is right for your home.
When preparing your space for new tiles, you might be tempted to reach for a general-purpose product like PVA to prime your walls or floors. However, we strongly advise against this. You should never use PVA (Polyvinyl Acetate) to prime a surface before tiling.
While PVA is a fantastic glue for crafts and woodworking, it is fundamentally incompatible with the chemistry of tiling. When PVA comes into contact with the moisture found in modern, cement-based tile adhesives, it can re-emulsify and produce acetic acid. This reaction prevents your adhesive from curing properly, leading to a weak, compromised bond that can cause your beautiful new tiles to come loose or fail over time.
Instead, always use a professional-grade primer designed specifically for tiling. A high-quality acrylic primer—such as Larsen Acrylic Sealer for Porous Substrates—is formulated to be completely free of PVA. These primers are engineered to control the suction of porous surfaces, ensuring your adhesive cures at the correct rate and creates an incredibly strong, long-lasting grip between the tile and the wall.
Great Tiles Tip: If you are unsure whether your walls have been previously treated with PVA, it is always worth a quick check. If you scratch the surface and it comes away in a milky, rubbery film, it is likely PVA and will need to be carefully removed or mechanically prepared before you can safely begin your project.
If you are currently getting ready to start your project and want to make sure you have the right materials for your specific wall or floor, please give our friendly team a call on 01295 233 640.
When you are designing a beautiful tiled worktop, you are creating a hub for food preparation, daily spills, and high-intensity use. Because this surface needs to be completely hygienic, your choice of grout is absolutely critical. Standard wall and floor grouts are not suitable for worktops.
While standard grouts are water-resistant, they are still porous at a microscopic level. Over time, this means that liquids, food oils, and bacteria can penetrate the surface of the grout, which is far from ideal for an area where you prepare meals.
To ensure your worktop remains perfectly clean and safe, you must use a professional epoxy grout, such as Larsen’s Epoxy Grout.
Why Epoxy is the Professional Choice
Unlike standard cement-based products, epoxy grout is completely impervious. Nothing can be absorbed into its surface, making it resistant to staining, mold, and bacterial growth. Because of its incredible strength and hygiene properties, it is the same high-performance product trusted for demanding environments like commercial kitchens and swimming pools.
Great Tiles Tip: Because epoxy grout sets much faster than standard grout, we recommend working in small sections when applying it to your worktop. Always have an appropriate epoxy cleaning aid or emulsifier on hand to wipe away any excess immediately—this ensures you get a professional, clean finish without any residue left on your beautiful tiles.
If you are planning a kitchen project and would like advice on selecting the right color epoxy grout to complement your chosen tiles, please give our friendly team a call on 01295 233 640.
Getting the depth right is crucial when preparing your subfloor, and selecting the correct compound ensures your base is strong, level, and ready for your new tiles. We offer two excellent options from the Ultra range, each designed for different project requirements.
Ultra ProLevel Fibre Self Levelling Compound 20kg
For deeper fills and projects where extra flexibility is needed—such as over timber floors or underfloor heating systems—our Ultra ProLevel Fibre Self Levelling Compound is the ideal choice. Its specially formulated fibre technology adds superior strength, and it can be applied at a depth of up to 75mm in a single application.
Ultra ProLevel One Self Levelling Compound 20kg
If you are looking for a high-strength, rapid-drying solution for standard smoothing and levelling of irregular substrates, our Ultra ProLevel One Self Levelling Compound is an excellent, reliable performer. This product is formulated for applications at a depth of up to 60mm.
Great Tiles Tip: To choose the best product for your specific floor, consider the substrate you are working on. If you are dealing with a flexible surface like plywood or a space with underfloor heating, the Fibre version provides that extra peace of mind through its enhanced flexibility and deeper fill capacity. Always ensure your
When you are planning a new wall tiling project, it is tempting to tile directly over existing paint. However, in most cases, painted surfaces are simply not suitable for tiling. Before you begin, you must carefully examine the surface to determine the best approach.
Standard finishes like emulsion paint, lime-wash, and distemper should almost always be removed. Because emulsion paint is water-based, it can soften when it comes into contact with the moisture in tile adhesives. This creates a weak, unreliable bond that puts your beautiful new tiles at risk of failing or detaching from the wall over time.
While removing old paint can be labor-intensive and might damage the underlying plaster, there is a much better, professional-grade solution.
The Professional Alternative: Tecca Fibre Cement Board
If you are concerned about the integrity of your current walls, or if removing the old paint seems like a monumental task, we recommend installing Tecca Fibre Cement Board instead.
- The Perfect Foundation: These boards provide a stable, perfectly flat, and moisture-resistant substrate that is purpose-built for tiling.
- Superior Strength: By fixing these boards to your wall, you create a dedicated "tiling surface" that ensures your adhesive creates a rock-solid, permanent bond.
- Easy Application: They are straightforward to install and give you the peace of mind that your project is built on the right foundation from the very start.
Great Tiles Tip: If you absolutely must attempt to tile over a painted surface, you must first test the strength of the existing paint. Use a strong tape—apply it firmly to the wall and pull it away quickly. If the paint comes off with the tape, it is not sound and must be removed. However, for a truly professional, long-lasting finish, using a high-quality cement board like Tecca Fibre Cement Board is always the superior choice.
If you are unsure about the state of your current walls or would like to learn more about the benefits of using Tecca Fibre Cement Board for your project, please give our friendly customer service team a call on 01295 233 640.
"Lippage" is a common installation challenge where adjacent tiles are set at slightly different heights, leaving the edge of one tile higher than the other—forming a "lip." Beyond just being a visual distraction, severe lippage can create a real trip hazard in your home.
The key to a perfectly flat, professional-looking floor lies in your preparation and the tools you use.
Expert Steps to Prevent Lippage
- Start with a Level Substrate: Before you lay a single tile, ensure your floor is as flat as possible. If the subfloor is uneven, your tiles will naturally follow those contours, leading to an uneven finish.
- Choose the Right Pattern: If you are planning an offset (brick bond) layout, we strongly recommend a 1/3rd offset pattern rather than a 50/50 split. A 50/50 pattern places the high point of one tile directly next to the low point of the next; a 1/3rd offset helps disperse this, resulting in a much flatter, more uniform surface.
Professional Levelling Systems
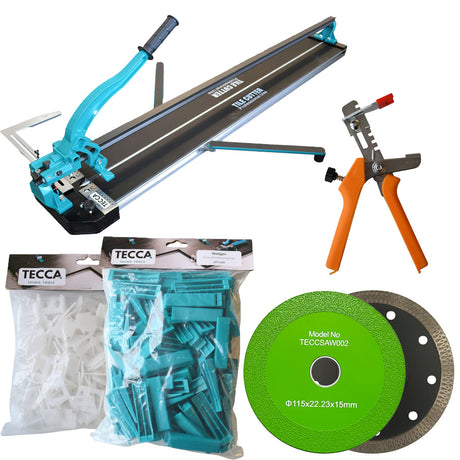
To help produce a perfectly flat floor, we recommend using the Tecca Levelling Clips and Wedges system. This system consists of two separate pieces designed to work together to ensure your tiles remain perfectly flat.
- Levelling Clips: These small plastic clips sit under the tile, with the stem protruding through the grout joint to act as a spacer.
- Levelling Wedges: These are inserted through the clips and can be tightened to pull the tiles into perfect alignment.
Once the adhesive has fully dried, the wedges are removed, and the clips are simply snapped off. This leaves you with a flawlessly level floor and no unsightly ‘lippage’.
Great Tiles Tip: Always take a moment to "back-butter" your tiles, especially with large formats. Applying a layer of adhesive to both the subfloor and the back of the tile ensures full coverage and prevents hollow spots, which helps keep your tiles locked in a perfectly level position from the moment they are placed.
Tile FAQ’s
When you are dreaming up your perfect space, every millimeter counts. Rectified tiles are the secret to achieving that seamless, high-end finish that really elevates a room. Put simply, these are ceramic or porcelain tiles that have undergone an extra stage of processing to reach an incredibly precise, uniform size.
While they begin their journey the same way as standard tiles, rectified tiles are purposefully manufactured slightly larger than their intended final dimensions. Once they have been through the kiln, the edges are expertly ground down with diamond saws. This creates a near-perfect straight edge at a perfect 90-degree angle.
Because these edges are so consistent, you can achieve a much finer, tighter grout joint—sometimes as slim as 1.5mm to 2mm. This minimizes the visual interruption between tiles, allowing the beauty of the material to take center stage and creating a clean, expansive, and sophisticated look that really opens up a room.
Great Tiles Tip: If you are opting for rectified tiles to get that seamless look, remember that your floor or wall surface needs to be perfectly level. Because the grout joints are so fine, any slight variation in the substrate will be much more noticeable than it would be with standard tiles.
When you are balancing style with the practical needs of your home, understanding the difference between ceramic and porcelain is the first step toward a beautiful, long-lasting finish. While they might look similar on the surface, their "DNA" is quite different.
At their core, both are crafted from natural clay mixtures and fired in a kiln. The real magic—and the difference in performance—happens during that firing process. Porcelain tiles are created using more refined, denser clays and are fired at significantly higher temperatures for longer periods. This results in a tile that is incredibly dense, hard-wearing, and virtually non-porous.
Think of ceramic as your versatile, classic choice for walls and light-traffic floors, while porcelain is the powerhouse, built to withstand the rigors of busy family life, high-traffic hallways, and even outdoor spaces. Because of that extra density, porcelain is often considered the premium choice for longevity, offering a robust quality that stands up to the daily hustle and bustle of your home.
Great Tiles Tip: When deciding between the two, always consider the "life" of the room. If you are tiling a busy kitchen floor or an entrance hall, that extra durability in porcelain is a smart, future-proof investment for your home.
Creating a stunning focal point around a wood-burning stove is one of the most rewarding ways to add warmth and character to a home. When you’re bringing fire and interior design together, choosing the right material is essential for both safety and lasting beauty.
Because tiles are fired at incredibly high temperatures during their creation, they are naturally heat-resistant. However, not all tiles react the same way to the sustained, intense heat of a stove. While some ceramic tiles are beautiful, they can occasionally develop "crazing"—a delicate, cobweb-like pattern in the glaze—when exposed to extreme heat cycles. For this reason, we almost always recommend porcelain tiles for your stove surround.
Porcelain is incredibly dense and durable, making it perfectly suited to handle the heat. It’s also a dream to keep clean, which is vital when dealing with soot and ash. Just remember to check if your specific choice of porcelain requires sealing before installation, as this keeps the surface pristine. To keep your finish looking flawless, we also suggest applying a high-quality Grout Protector to your joints. This simple extra step acts as an invisible shield, ensuring that soot and ash wipe away easily rather than staining your hard work.
Great Tiles Tip: When planning your fireplace design, always double-check the manufacturer’s clearance guidelines for your stove to ensure the distance between the heat source and your tiles is perfect for both performance and safety.
When you’re choosing the foundation for your home, you want surfaces that not only look beautiful but are ready to embrace the rhythm of your daily life. Both ceramic and porcelain tiles are fantastic options, but understanding how they wear over time helps you choose the perfect tile for the right space.
At their heart, both materials are incredibly capable around the home. Ceramic tiles are a classic choice for walls and floors in lower-traffic areas, offering a beautiful, crisp aesthetic that breathes life into bathrooms and guest spaces. However, when we look at the high-energy zones of a home—like busy hallways, open-plan kitchens, or active utility rooms—we look to porcelain.
Because porcelain is fired at higher temperatures and crafted from more refined, denser clays, it offers a level of resilience that is second to none. It’s a powerhouse designed to withstand heavy footfall, accidental drops, and the general wear and tear of family living without losing its luster. For commercial environments where thousands of steps are taken every day, porcelain is the absolute industry standard to ensure your floor remains as stunning on year ten as it was on day one.
Great Tiles Tip: When you’re browsing, keep an eye out for the PEI (Porcelain Enamel Institute) rating on your chosen tiles. This handy scale tells you exactly how much traffic a tile is designed to handle, ensuring your beautiful new floor is perfectly matched to the lifestyle of your household.
When you are planning a feature wall with those stunning, large-format tiles, it is easy to get swept up in the aesthetic. However, before you start, we have to talk about the mechanics behind the beauty. Installing tiles on a wall is a structural decision, and safety is the most important part of the process.
It is vital to remember that the weight on your wall isn't just the tile itself; you must account for the weight of your adhesive and grout as well. Different wall surfaces have different weight-bearing capacities, and sticking to these limits ensures your installation stays exactly where it should—securely on the wall. If you are ever unsure about the state of your walls or what they are made of, always consult with a professional tiler to get the green light before you begin.
As per the British Standard BS5385, here is a guide to the maximum weight capacities for wall substrates in good condition:
Gypsum plaster: 20kg/m²
Gypsum plasterboard (12.5mm thickness): 32kg/m²
Sand and cement rendering: 64kg/m²
Lightweight foam-cored tile backer boards: 60kg/m²
Glass reinforced cement-based boards: 50kg/m²
Gypsum fibreboards: 40kg/m²
Other rigid tile backer boards: Consult manufacturer
Great Tiles Tip: If your heart is set on a heavy, large-format tile that exceeds the capacity of your wall, don't worry! You can often upgrade your substrate to a high-performance tile backer board, which significantly increases the weight limit, allowing you to achieve your dream design safely.
When you are creating a cohesive look for your home, consistency is key. Understanding shade variation is one of those professional insights that helps ensure your finished space looks exactly as you envisioned.
Because tiles are crafted in massive production runs—sometimes reaching 100,000m² or more—the final result is influenced by the natural raw materials used in that specific batch. Even the slightest shift in those materials can result in subtle differences in tone or color when a new batch is produced later. To manage this, manufacturers assign a unique "Shade Number," "Batch Number," or "Tono" to every run. You will typically find these codes printed clearly on the side of your tile boxes.
The secret to avoiding unwanted color shifts across your installation is simple: aim to complete your project from a single batch. By calculating your area carefully and purchasing all the tiles you need at once, you ensure that every tile has been fired under the exact same conditions, resulting in a beautiful, uniform finish.
Great Tiles Tip: Always keep a note of your batch or shade number once your tiles arrive! If you ever find yourself needing an extra box to finish a tricky corner or for future repairs, having that specific number allows us to check our current stock to see if we can match your original tiles perfectly.
When you are aiming for a flawless, professional finish, understanding the technical details behind your tiles is key. One of those vital details is the "caliber."
Because tiles are crafted from natural clay, the firing process—where the clay shrinks in the heat—can result in very slight variations from one production batch to the next. A tile might have a "nominal size" (the size it is sold as, like 60x60cm), but its actual physical measurement can differ by a fraction of a millimeter. To ensure your finished floor or wall is perfectly aligned, manufacturers use high-precision laser technology to measure every tile after firing. They are then sorted into groups of identical physical dimensions, which are known as the caliber.
All tiles with the same caliber are packed together and clearly marked on the box with a code—often a number or a combination of letters and numbers. This careful sorting ensures that you aren't mixing slightly different sizes in the same installation, which helps you achieve those beautifully straight, consistent grout lines. It is worth noting that rectified tiles often bypass this step, as their edges are ground down after firing to reach a precise, uniform size.
Great Tiles Tip: Just like your shade or batch number, always make a note of the caliber listed on your tile packaging. If you ever need to order more tiles, having this information handy allows us to help you find a perfect match, ensuring your installation remains consistent and beautiful from corner to corner.
If you are planning your project and need any help, please give our team a call on 01295 233 640.
When you are looking to elevate your outdoor space, 20mm porcelain is the ultimate game-changer. These tiles are specifically engineered for the outdoors, boasting the same beautiful aesthetic as your indoor flooring but with the robust, heavy-duty construction needed to withstand the elements.
At 20mm thick, these tiles are significantly denser and stronger than standard indoor porcelain. This extra mass means they can be dry-laid directly onto grass, gravel, or sand, or even installed onto adjustable support pedestals. This makes them an incredibly versatile solution for patios, balconies, or creating seamless walkways through your garden, all without the need for intensive groundwork or traditional adhesive and grout methods.
Great Tiles Tip: Because 20mm porcelain is so sturdy, you can often achieve a stunning, continuous aesthetic by choosing a matching 10mm range for your indoor kitchen or living room and pairing it with the 20mm version for your patio. This creates a "broken-plan" living experience that visually expands your home as soon as you open the doors!
If you are dreaming of a seamless indoor-outdoor transition, give our friendly team a call on 01295 233 640—we would love to help you find the perfect matching ranges for your project.
When you are investing in a new floor or wall, knowing how well the surface will stand up to everyday life is essential. That is where the PEI rating comes in—a trusted industry standard that gives you complete clarity and confidence in your tile's surface durability.
Established by the Porcelain Enamel Institute (PEI), this rating measures a tile's resistance to surface abrasion and wear. Specialized testing machines are used to simulate varying levels of foot traffic, categorizing each tile on a straightforward scale from 0 to 5 so you can match the material perfectly to its environment.
The PEI Rating Scale Breakdown
- PEI 0 — Wall Tiles Only: Designed exclusively for vertical wall surfaces where there is no foot traffic or surface wear.
- PEI 1 — Light Footfall: Ideal for walls, splashbacks, and very low-traffic residential spaces like an ensuite or a quiet bedroom where soft footwear is worn.
- PEI 2 — Moderate Footfall: Perfect for lighter residential areas with minimal traffic, such as standard bathrooms and private WCs.
- PEI 3 — Regular Footfall: Highly versatile and suitable for all domestic living spaces, including high-energy zones like busy family kitchens and hallways.
- PEI 4 — Intense Footfall: Built to handle heavy domestic traffic as well as light commercial settings, such as boutique offices or restaurants.
- PEI 5 — Heavy Footfall: Engineered for extreme-use public environments, including shopping centers, commercial corridors, and airports.
It is worth noting that a tile’s PEI rating measures the durability of the glaze and surface against abrasion, not the overall thickness of the tile. A thicker tile does not automatically mean a harder-wearing surface, making the PEI rating your true guide for surface longevity.
Great Tiles Tip: When you are specifying a floor for a high-traffic zone like a busy kitchen or hallway, always look for a minimum PEI rating of 3. This ensures your gorgeous new floor is ready to handle everything from muddy paws to daily family life without losing its pristine finish.
When choosing the right floor tile for your home, safety is just as important as style. To help you make the best choice, tiles are tested for slip resistance using the "R" rating system, which stands for the "Ramp Test." This scale measures how much grip a tile provides, helping you match the right texture to the right room.
The scale ranges from R9 (standard grip) to R13 (maximum grip). Understanding this allows you to create a beautiful, functional space that gives you peace of mind.
The ‘R’ Rating Guide
- R9: Perfectly suited for standard internal residential use. If you are using these in a bathroom, we recommend keeping a bath mat nearby to dry your feet.
- R10: A fantastic all-rounder. With a slightly higher grip, these are excellent for kitchens, hallways, and living areas.
- R11: Designed for higher-traffic zones. These offer great performance in office entrances, utility rooms, and commercial settings like small workshops.
- R12: Built for challenging environments. These excel in larger commercial spaces, areas with liquid contaminants, or as a robust choice for external porcelain patios.
- R13: The peak of slip resistance. These are used in high-safety zones like public swimming pool surrounds, steep slopes, or commercial kitchens where oil spills are a concern.
Great Tiles Tip: When selecting your perfect floor, look at both the 'R' rating and the 'PEI' rating together. While the 'R' rating tells you how much grip the surface provides, the 'PEI' rating ensures the tile has the surface durability to handle the foot traffic of your home. Combining these two insights means you can be confident that your new floor will be both stylish, safe, and long-lasting.
If you need any guidance on selecting the right grip for your specific project, please give our friendly team a call on 01295 233 640.
When you fall in love with the high-shine, reflective beauty of a polished porcelain tile, you naturally want to keep that mirror-like finish looking pristine for years to come. A common question we hear is whether these stunning tiles need to be sealed, and the answer is an important "yes."
While porcelain is naturally dense and low-porosity, the polishing process is what creates that beautiful, high-gloss surface. To achieve that level of shine, the manufacturer buffs away the top layer of the tile, which can expose microscopic pores on the surface. If left unprotected, these tiny openings can trap pigment from your grout or dirt during the installation process, leading to a frustrating "grout haze" that makes your tiles look dull or cloudy.
Regarding pre-sealing: some manufacturers apply a "nano-seal" or a protective wax coating during production to help prevent surface damage during transit. However, you should never assume your tiles are pre-sealed, as this varies by range. If you are unsure, you can perform a simple "marker test" on a spare tile: if a permanent marker mark is difficult to remove, the tile is porous and definitely needs sealing. Even if a factory has applied a temporary coating, it may not be sufficient to protect against modern, high-performance grouts.
Great Tiles Tip: To keep your installation smooth and stress-free, apply a coat of sealer to the tiles before you grout. This acts as a protective barrier, preventing the grout from settling into those microscopic pores. Once your tiles are laid, cleaned, and dry, apply a second coat to lock in that shine. By taking this extra step during installation, you ensure your beautiful polished floor remains the bright, light-reflecting masterpiece you envisioned.
When it comes to achieving that perfect fit, selecting the right tool for the job is just as important as choosing the tiles themselves. Whether you are working with sleek porcelain, classic ceramic, or beautiful natural stone, the best cutter depends on two main things: the type and thickness of the tile, and the complexity of the cut you need to achieve.
The Rail Cutter ("Score and Snap")
For straight, clean cuts, a rail cutter is the professional’s go-to. It is quick to set up, produces minimal mess, and is exceptionally efficient. It works by scoring the surface of the tile and then applying controlled pressure on either side of the line, causing the tile to break cleanly along the score.
- Best for: Straight cuts on ceramic and porcelain tiles.
- Capacity: With the right model and a high-quality scoring wheel, these can handle porcelain tiles up to 20mm thick.
- Pro Note: While these are brilliant for most jobs, they aren't ideal for natural stone, as the inherent natural faults in the stone make a perfectly straight break difficult to guarantee.
The Electric Wet Cutter
When your project demands more finesse—like cutting intricate shapes around light switches, pedestals, or working with thicker natural stone—an electric cutter is your best friend. These tools use a diamond-coated blade rotating at high speeds, cooled by a constant water bath to prevent overheating and ensure a smooth finish.
- Best for: Intricate shapes, notches, cut-outs, and cutting natural stone of any thickness.
- Flexibility: Because the blade cuts as you push the tile through, you can make partial cuts, rotate the tile, and achieve complex geometric shapes.
- Pro Note: While these machines offer incredible precision, they do require a bit of setup and can be a little messy due to the water involved, so plan your workspace accordingly.
Great Tiles Tip: For the best results, always pair your tool with a fresh, high-quality diamond blade or scoring wheel. A dull blade can cause chipping, while a sharp, correct-spec blade will glide through your porcelain or stone like a dream, giving you that crisp, designer edge you’re looking for.
While it might seem that a tile is simply a tile, not every option is suitable for both walls and floors. Choosing the right tile for your space is a balance of aesthetics, durability, and safety, and knowing the difference between wall and floor specifications is essential for a successful project.
Understanding Tile Suitability
- Floor Tiles: These are engineered to withstand the weight of foot traffic, furniture, and the occasional impact. They are generally thicker, denser, and more durable than wall tiles. Many floor tiles also have specific anti-slip ratings (R-ratings) to keep them safe underfoot.
- Wall Tiles: These are typically lighter and often have a softer, more decorative glaze. Because they don't need to support weight or withstand abrasion from foot traffic, they are not designed to handle the stresses of a floor environment. If you were to use a standard wall tile on a floor, it would likely crack or wear down very quickly.
Why You Can Usually Use Floor Tiles on Walls
While wall tiles should rarely go on floors, the reverse is often possible. Many floor tiles—especially modern porcelain—are dense and durable enough to be used on walls. This is a popular design choice for creating a seamless, "wrap-around" look in bathrooms or wet rooms. However, because floor tiles are heavier, you must ensure your wall substrate (or wall backing) is strong enough to support the extra weight. Always check the load-bearing capacity of your walls before proceeding.
Great Tiles Tip: Always check the technical specification for your chosen tile! Look for the "PEI rating" (Porcelain Enamel Institute), which measures a tile’s resistance to surface abrasion. A rating of PEI 3 or higher is generally recommended for residential floor use. If the tile is marked specifically as "Wall Only," it is vital to respect that, as the material composition will not have the structural strength required for the pressures of a floor.
If you have fallen in love with a particular tile and want to know if it is suitable for your specific project, please give our friendly team a call on 01295 233 640.
Useful Guides And How To's
When you’ve put so much heart and soul into your tiling project, the last thing you want is for your grout lines to lose their crisp, clean look due to everyday life. While most wall and floor grouts are designed to be water-resistant, "resistant" doesn't always mean "impenetrable." Over time, the porous nature of grout can allow dirt, oils, and moisture to settle into the joints, which is how staining happens.
The secret to keeping your grout looking fresh for years is simple: seal it. Once your installation is complete and the grout has fully cured, applying a professional-grade protector is the best way to safeguard your hard work.
Why Sealing is a Game-Changer
- Total Barrier: It stops the penetration of water, oil, grease, and even stubborn limescale.
- Effortless Cleaning: By preventing grime from soaking into the porous surface, spills and daily dust just wipe away, making your routine cleaning much faster and more effective.
- Long-Lasting Beauty: It keeps the original color of your grout vibrant, preventing that dull, discolored look that can develop over time in busy areas like kitchens and bathrooms.
Great Tiles Tip: Don't wait for your grout to start looking tired! Apply your protector as soon as your grout is fully cured and dry. It’s like giving your walls and floors an invisible raincoat that keeps everything looking showroom-fresh, even in the most well-loved corners of your home.
If you have just finished a project and want to make sure your finish stays perfect, give our friendly team a call on 01295 233 640—we can help you pick the right sealing products for your specific setup.
When you’re dealing with stubborn dried grout, a professional-grade residue remover is often the most effective solution. These cleaners are specifically formulated to break down the cementitious bonds of the grout, softening the residue so it can be wiped away without damaging the surface of your beautiful new tiles.
When choosing and using a residue remover, keep these key points in mind:
- Tailored Chemistry: Always ensure you are using a remover compatible with your specific tile type. For instance, acid-based cleaners are generally effective for many porcelain and ceramic tiles but can cause irreversible damage to natural stones like marble or limestone. Always check the manufacturer's compatibility guide.
- The Power of Patience: After applying the remover, give it the recommended time to sit on the surface. This "dwell time" is essential, as it allows the chemical to work its way through the hardened residue, turning it into a softer consistency that is far easier to remove.
- The Agitation Step: Once the product has had time to react, gently scrubbing the area with a non-scratch abrasive pad or a stiff-bristled brush will help loosen the bond. After agitation, it is vital to rinse the area thoroughly with clean water to neutralize the surface and remove any lingering chemicals.
Great Tiles Tip: If you are working on a textured or "anti-slip" tile, residue can sometimes settle deep into the surface profile, making it a little harder to reach. In these cases, a slightly stiffer brush is your best ally—it helps work the cleaner deep into the texture to ensure every last trace of haze is lifted, restoring the tile to its original, pristine state.
If you have a particularly stubborn patch of grout residue and aren't sure which type of cleaner is safe for your tiles, please give our friendly team a call on 01295 233 640—we would be happy to help you identify the right approach.
Creating a reliable, watertight barrier is the most important part of any shower installation. While your tiles and grout are beautiful, they are not naturally waterproof on their own. To prevent moisture from damaging the structure of your home, you must create a protected "tanked" environment behind the tiles.
Waterproofing, or "tanking," involves applying a specialized membrane to the walls and floor of your shower area before tiling. This creates an impenetrable shield that stops water from seeping into the substrate (like plasterboard or floorboards), which is essential for protecting your home against damp and rot.
The Waterproofing Process
Prep the Surface: Ensure your walls and floors are clean, dry, and dust-free. If you are using plasterboard, ensure it is a moisture-resistant grade.
Seal the Corners: Use flexible sealing tape in all internal corners and around pipe entries. These are the most common areas where movement or leaks occur, so reinforcing them with high-performance, flexible tape is vital.
Apply the Membrane: Use a liquid-applied tanking membrane, painting it onto the walls and floor area. You should typically apply at least two coats, allowing for the recommended drying time in between. This forms a seamless, rubber-like skin that blocks water completely.
Great Tiles Tip: Don't forget the pipework! Use specialized rubber pipe collars around your shower mixer and water outlets. These sit over the pipe before you tile, creating a watertight seal that integrates perfectly with your tanked membrane, giving you total security in your wet room or shower enclosure.
If you are currently planning your bathroom renovation and want to make sure you have everything you need to build a perfect, watertight shower, please give our friendly team a call on 01295 233 640.
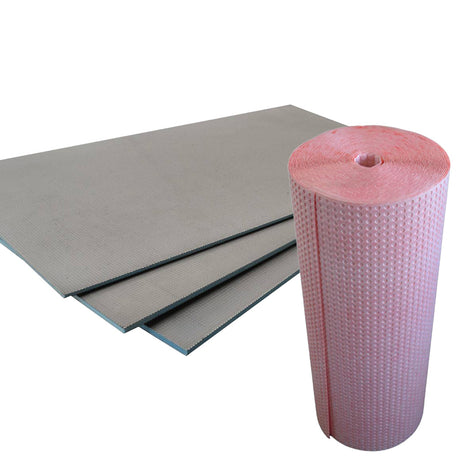
An anti-crack membrane—often called an anti-fracture or decoupling membrane—is a vital layer installed between your subfloor and your tiles. Its primary purpose is to act as a protective barrier that isolates your tiles from the subfloor, ensuring that any lateral movement or cracking in the substrate is not transferred through to your finished floor. This is especially critical when tiling over materials prone to movement, such as timber floors.
How It Works
Modern solutions like the Tecca Decoupling Mat utilize clever engineering to protect your investment. One side of the mat features a fleece-like decoupling layer. When your subfloor expands or contracts due to temperature changes or building settlement, this fleece allows the substrate to move independently of the tile. By "decoupling" the two layers, the stress is absorbed by the mat rather than your tiles, effectively preventing cracks or loose tiles.
Why They Are Essential Today
As interior design trends have moved toward larger-format tiles, these membranes have become more important than ever. Traditionally, grout joints acted as tiny expansion joints throughout the floor. With larger tiles, you have fewer grout lines to absorb that natural movement, making a decoupling mat an essential safeguard for a flawless, long-lasting finish.
Great Tiles Tip: While these membranes are famous for preventing cracks, they also provide excellent structural support. If you are installing underfloor heating, ensure your decoupling mat is compatible with your heating system to ensure that both the warmth and the structural integrity of the floor are optimized. Think of it as the ultimate insurance policy for your beautiful new floor.
If you are planning a project on a timber floor or using large-format tiles and want to ensure your installation is built to last, give our friendly team a call on 01295 233 640.